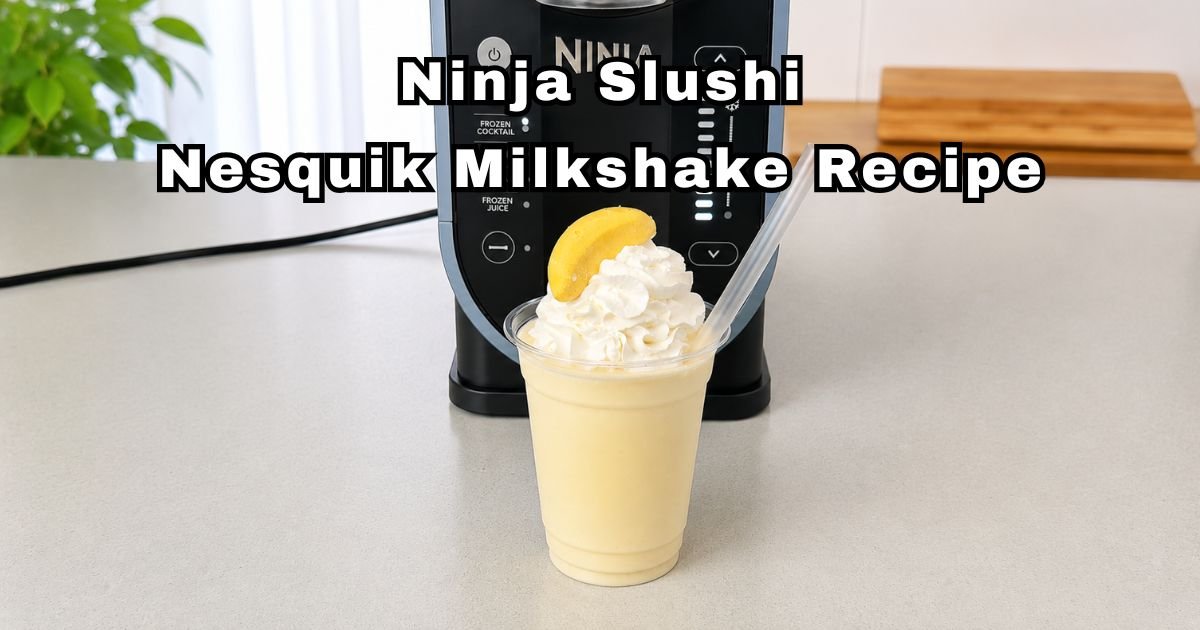
Ninja Slushi Nesquik Milkshake Recipe
Some recipes become favorites because they are easy. Others stay in my recipe collection because they never let me down. This Ninja Slushi Nesquik Milkshake Recipe is one of those recipes.
The Ninja Slushi creates a smooth frozen texture that usually takes a powerful blender to get.
Banana Nesquik adds the sweet flavor I have loved for years. Together, they turn a few simple ingredients into a thick and creamy milkshake in only a few minutes.
I started making this recipe after buying my Ninja Slushi, and it quickly became one I looked forward to.
Mixing milk, cream, condensed milk, and Banana Nesquik takes very little time, while the machine creates the smooth texture for me. I finish every glass with whipped cream and a banana lolly before serving.
This Ninja Slushi Nesquik Milkshake Recipe is the one I make most often because it is simple, creamy, and turns out the same every time.
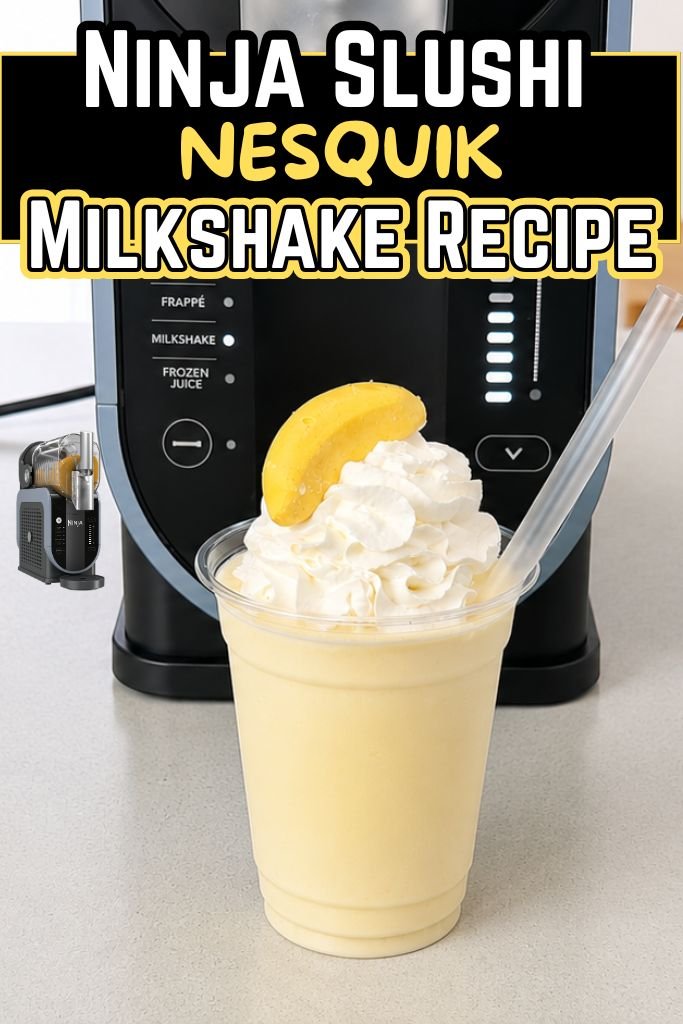
Why the Ninja Slushi Works So Well for Nesquik Milkshakes
The Ninja Slushi makes frozen milkshakes simple and quick. It freezes the drink while mixing everything together, so every glass comes out smooth and creamy.
- Difference From Blender Milkshakes – A blender crushes ice to chill the drink, but the Ninja Slushi freezes the mixture inside the machine. This creates a smoother texture without watery ice pieces or uneven blending from start to finish.
- Nesquik Powder Freezes Better Than Many Syrups – Banana Nesquik powder mixes evenly into the milk before freezing. Many thick syrups can settle or become uneven, while the powder helps create a smooth frozen milkshake with balanced flavor in every sip.
- Faster and Less Mess Than a Traditional Blender – Everything mixes and freezes inside one machine. There is no blender pitcher, crushed ice, or extra bowls to clean, making the whole process faster and much easier after serving.
- Delivers Consistent Results Every Time – Using the same ingredient amounts gives the same creamy texture each batch. The Ninja Slushi keeps freezing at a steady pace, helping beginners get reliable results without guessing.
- Creates a Smooth, Creamy Slushi Texture – The freezing system creates tiny ice crystals that stay soft instead of chunky. This gives the milkshake a creamy texture that pours easily and feels rich from the first sip to the last.
Ingredients for Ninja Slushi Nesquik Milkshake
Banana Nesquik – (6 tablespoons): Banana Nesquik adds a sweet banana flavor along with the classic milkshake texture. Measure six level tablespoons for a balanced flavor.
Use 6 tablespoons of Chocolate Nesquik or 6 tablespoons of Strawberry Nesquik to create a different milkshake flavor.
Full-Cream Milk – (1 liter): Full-cream milk creates a creamy base and freezes well in the Ninja Slushi machine. Lower-fat milk can produce a thinner texture.
You can use 1 liter of whole lactose-free milk or 1 liter of 2% milk as alternatives, although the milkshake will have a slightly lighter consistency.
Thickened Cream – (1/4 cup): Thickened cream adds body and helps create a silky frozen texture, giving the milkshake a creamier finish.
Use 1/4 cup of heavy cream or 1/4 cup of whipping cream for a very similar result.
Condensed Milk – (1/2 cup, about 200 g): Condensed milk adds sweetness and helps achieve a smooth, creamy consistency. Using significantly more may slow the freezing process.
For a dairy-free version, replace it with 1/3 cup of sweetened condensed coconut milk.
Whipped Cream – (about 1/2 cup): Whipped cream creates a light, fluffy topping that pairs perfectly with the cold milkshake. Add it just before serving.
For a dairy-free option, use 1/2 cup of dairy-free whipped topping.
Banana Lolly – (1 piece): A banana lolly adds extra banana flavor and gives the milkshake a fun finishing touch. Place it on top just before serving.
Equipment Needed
- Ninja Slushi Machine – Freezes and mixes the drink.
- Large Measuring Cup – Measures the milk.
- Measuring Spoons – Measures the Nesquik powder.
- Liquid Measuring Cup – Measures cream and condensed milk.
- Mixing Bowl or Large Jug – Mixes ingredients together.
- Whisk – Blends everything smoothly.
- Rubber Spatula – Scrapes the bowl clean.
- Serving Glasses – Holds the finished milkshake.
- Long Spoon or Straw – Easy for serving and drinking.
How to Make Ninja Slushi Nesquik Milkshake
Step 1 | Mix the Milk Base
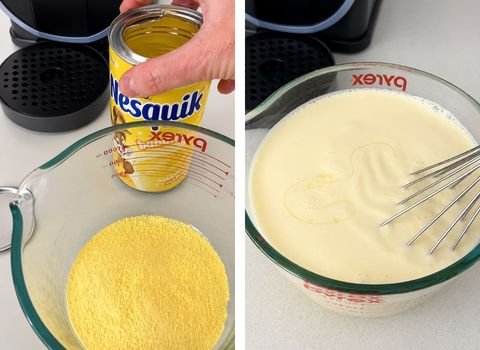
Pour 1 liter (4¼ cups) of full-cream milk into a large measuring jug or mixing bowl. Add 6 tablespoons of Banana Nesquik powder and whisk for about 1 minute until fully dissolved.
Pour in ¼ cup thickened cream and whisk for another 30 seconds until completely blended. The mixture should be smooth with no dry powder remaining.
Step 2 | Add the Condensed Milk
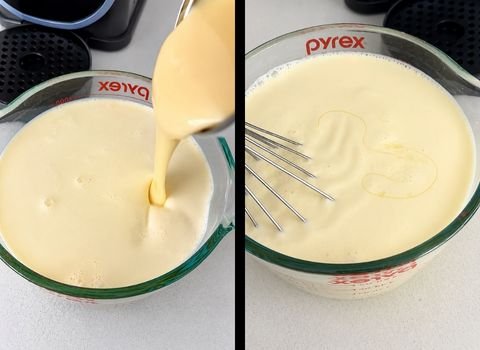
Pour ½ cup sweetened condensed milk into the bowl. Whisk for about 1 minute until the mixture becomes smooth and evenly combined.
Make sure the condensed milk is fully incorporated before moving to the next step.
Step 3 | Fill the Ninja Slushi
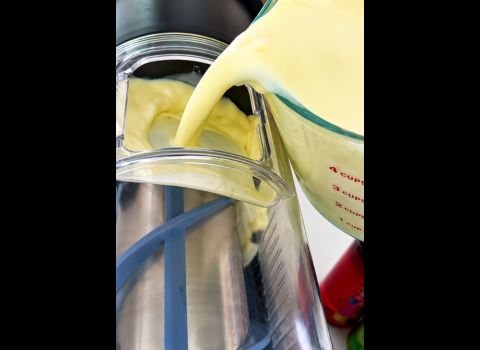
Carefully pour the prepared mixture into the Ninja Slushi container, staying below the maximum fill line. This leaves enough room for the mixture to freeze and circulate properly during the cycle.
Step 4 | Select Milkshake Mode
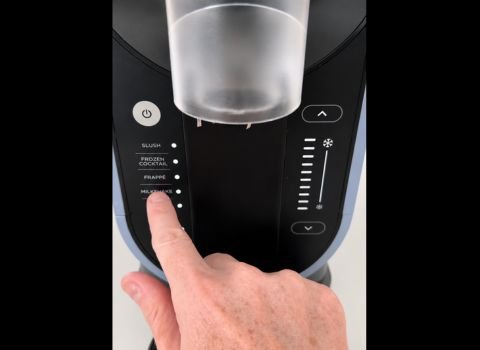
Close the lid securely and turn on the Ninja Slushi. Select Milkshake Mode and allow the machine to complete the full freezing cycle without opening the lid or interrupting the program.
Step 5 | Check the Texture
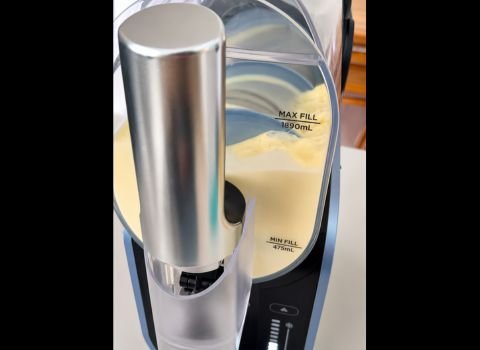
Once the cycle is complete, check the consistency of the milkshake. It should be thick, smooth, and easy to pour. Let the machine run for a few more minutes when a thicker texture is preferred.
Step 6 | Dispense the Milkshake
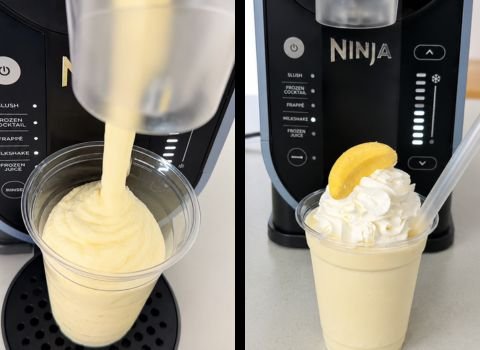
Place a serving glass under the dispenser and fill it with the frozen milkshake. The milkshake should be creamy with no large ice crystals or undissolved powder.
Step 7 | Add the Toppings Before Serving
Top each serving with about 2 tablespoons of whipped cream and garnish with one banana lolly. Serve immediately while the milkshake is cold, thick, and creamy.
Chef’s Tips
- Chill the Ingredients – Cold milk, cream, and condensed milk help the machine freeze the mixture faster. Keeping everything in the refrigerator for a few hours before mixing gives a smoother milkshake.
- Let the Foam Settle – After whisking, let the mixture rest for about 2 minutes. This helps the bubbles settle and creates a smoother milkshake once the freezing cycle begins.
- Adjust the Sweetness – Taste the liquid mixture before pouring it into the Ninja Slushi. Stir in 1 tablespoon of condensed milk at a time when you want a sweeter milkshake.
- Add Crunch at the End – Crushed cookies, chopped nuts, or candy pieces should go on top after dispensing. Mixing them into the machine can affect the smooth frozen texture.
- Freeze the Serving Glass – Place the glasses in the freezer for 10 to 15 minutes before serving. A cold glass helps the milkshake stay thick and creamy a little longer.
Topping Ideas
A few simple toppings can turn this milkshake into an even richer treat. They add extra flavor, texture, and a great look without much extra work.
- Whipped Cream – A swirl of whipped cream adds a light, creamy finish that melts slowly into the milkshake. It also gives every glass a classic ice cream shop look.
- Chocolate Drizzle – Drizzle one or two teaspoons of chocolate syrup over the whipped cream or around the inside of the glass. It adds extra chocolate flavor and a nice finishing touch.
- Cookie Crumbs – Crushed chocolate sandwich cookies or vanilla cookies add a light crunch. Sprinkle about 2 tablespoons over the whipped cream just before serving.
- Mini Marshmallows – Scatter 2 tablespoons of mini marshmallows on top. They add a soft, sweet bite that pairs well with the creamy banana milkshake.
- Chocolate Shavings – Use a vegetable peeler to shave a small chocolate bar. About 1 tablespoon of chocolate shavings gives a chocolate finish without making the topping too heavy.
- Sprinkles – Colorful sprinkles add a cheerful look and a little crunch. About 1 tablespoon is enough to decorate the whipped cream without overpowering the milkshake.
- Crushed Candy – Top each glass with 1 tablespoon of crushed chocolate candy or banana-flavored candy pieces. They add extra sweetness and a crisp texture with every sip.
What to Serve with a Nesquik Milkshake
A Ninja Slushi Nesquik Milkshake pairs well with both sweet and simple foods. Warm chocolate chip cookies make a great choice because their soft texture complements the cold, creamy drink.
Banana bread is another favorite, with its sweet flavor matching the milkshake without being too strong.
For a more filling option, serve the milkshake with pancakes, waffles, or French toast to create a fun breakfast-inspired treat.
Fresh banana slices, mixed berries, strawberries, or apple slices add a fresh touch and help balance the meal.
Keeping the sides simple lets the creamy banana flavor remain the highlight while creating a balanced treat without being too much.
Storage and Leftovers
The Ninja SLUSHi can keep the milkshake at the right frozen texture for up to 12 hours during its continuous run time. After that, the freezing cycle stops automatically.
Store leftover milkshake in a covered container in the refrigerator for up to 2 days or freeze it for up to 1 month.
After it melts, stir well or run it through the Ninja Slushi again to restore the creamy texture. For the best flavor and texture, prepare a fresh batch when possible.
Ninja Slushi Nesquik Milkshake Recipe FAQs
1. Can I add fruit to this milkshake recipe?
You can add fruit, but blend it into the liquid mixture before pouring it into the machine. Fresh bananas or strawberries work very well with the Nesquik flavor.
Use about ½ cup of mashed fruit for the best results. The fruit adds natural sweetness and a different texture. Just keep the total liquid amount the same.
2. Why did my milkshake turn out too thick?
A milkshake can become too thick when too much Nesquik powder or cream is added. Very cold ingredients may also help it freeze faster.
Add ¼ cup of full-cream milk and stir gently until the texture becomes smoother. Small adjustments work better than adding a large amount of milk all at once.
3. Why is my milkshake too thin?
A thin milkshake usually means the mixture has too much milk or not enough freezing time. Let the Ninja Slushi continue running for a few more minutes.
Next time, measure the ingredients carefully and avoid adding extra milk unless the mixture becomes overly thick before freezing.
4. Can I make this milkshake dairy-free?
Yes, you can make a dairy-free version of this recipe. Replace the milk with oat milk, almond milk, or coconut milk. Use dairy-free cream and sweetened condensed coconut milk instead of regular.
The texture might be slightly different, but it will still taste delicious. Just keep all the measurements the same.
Ninja Slushi Nesquik Milkshake Recipe
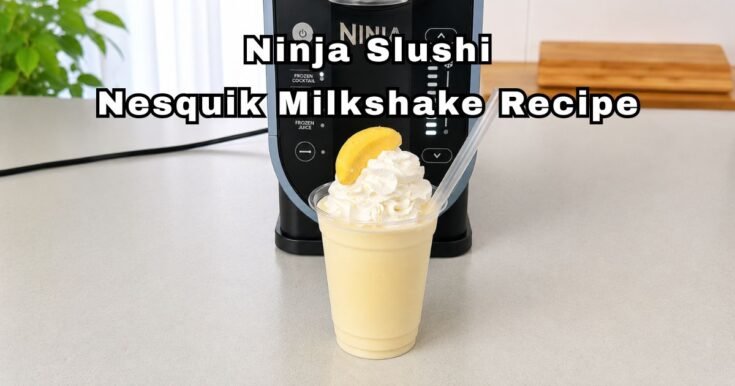
Ninja Slushi Nesquik Milkshake Recipe makes a thick, creamy frozen banana milkshake with simple ingredients and easy step-by-step instructions.
Ingredients
- 1 liter (4¼ cups) full-cream milk
- 6 tablespoons Banana Nesquik powder
- ¼ cup thickened cream
- ½ cup (about 200 g) sweetened condensed milk
- ½ cup whipped cream (for topping)
- 4 banana lollies (1 per serving, for garnish)
Instructions
- Pour 1 liter (4¼ cups) of full-cream milk into a large measuring jug or mixing bowl. Add 6 tablespoons of Banana Nesquik powder and whisk for about 1 minute until fully dissolved. Pour in ¼ cup thickened cream and whisk for another 30 seconds until completely blended. The mixture should be smooth with no dry powder remaining.
- Pour ½ cup sweetened condensed milk into the bowl. Whisk for about 1 minute until the mixture becomes smooth and evenly combined. Make sure the condensed milk is fully incorporated before moving to the next step.
- Carefully pour the prepared mixture into the Ninja Slushi container, staying below the maximum fill line. This leaves enough room for the mixture to freeze and circulate properly during the cycle.
- Close the lid securely and turn on the Ninja Slushi. Select Milkshake Mode and allow the machine to complete the full freezing cycle without opening the lid or interrupting the program.
- Once the cycle is complete, check the consistency of the milkshake. It should be thick, smooth, and easy to pour. Let the machine run for a few more minutes when a thicker texture is preferred.
- Place a serving glass under the dispenser and fill it with the frozen milkshake. The milkshake should be creamy with no large ice crystals or undissolved powder.
- Top each serving with about 2 tablespoons of whipped cream and garnish with one banana lolly. Serve immediately while the milkshake is cold, thick, and creamy.
Nutrition Information
Serving Size (Per Serving)Amount Per Serving Calories 485Total Fat 21gSaturated Fat 13gTrans Fat .5gCholesterol 70mgSodium 180mgCarbohydrates 63gFiber .5gSugar 57gProtein 11g
This Ninja Slushi Nesquik Milkshake Recipe is quick, creamy, and easy to customize with new flavors and toppings.
Try different Nesquik varieties, and explore other Ninja Slushi recipes for more frozen drink ideas.